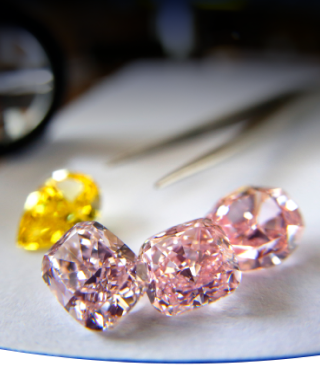
In this article, we give you important photography tips when using your mobile phone camera, including what to avoid, to create the most authentic image of your fancy color diamond.
Since casual photography took over our lives, whether taken with semi-professional cameras or our mobile phones, some kind of digital image will accompany any diamond report we propose to a client. The client then presents this image to the end buyer to induce the selling process.
The quality of the image becomes a crucial element to set the selling process in motion. As we have certain visual expectations from a diamond – especially a fancy color diamond, the color factor being the main motivation for the purchase – by saying quality, we actually mean authenticity.
The vast majority of all fancy color diamond images we encounter in our everyday work – such as websites that exhibit inventory, mobile phone images, or even auction catalogs – do not faithfully represent the actual look of the diamond. These images, in most cases, are over processed. This creates disappointment for the buyer once the stone is presented. In any case, low quality images that do not do justice to the stone will not motivate the buyer to even ask to see it.
In this article, we give you important photography tips when using your mobile phone camera, including what to avoid, to create the most authentic image of your fancy color diamond. With enough practice, you will be able to come up with amazing images and videos that will match the look of your diamond in real life.
General
All images in this article were taken with an iPhone during regular daytime office conditions, with a window facing north. No filters were applied.
Mobile phones always create better diamond images using the video mode. The diamond will appear closer, showing the diamond’s sparkle and its real, face-up color dispersion.
Moving the diamond slightly closer or farther from the camera will help you find the right focal point as well.
Still images, on the other hand, are less forgiving in this sense, as the focal point in most cases will be on the center, leaving the crown blurry.
The downsides for the video mode are the Background noises.
This can be addressed quite easily by muting the sound in any editing software.
Regardless which mode you use, it is important to clean the lens (front or rear) prior to taking any shot. A dirty lens will create a smothered, hazy image. Make sure you clean the lens area (see image below) with a diamond cloth.

Background
Most mobile phone cameras have a color-balancing algorithm. Simply put, it means that the camera’s phone is trying to average exposure between two extreme axes, especially when the subject is small and the background dark. This configuration will lighten the diamond’s image dramatically. In most cases, a black background will make the diamond appear much lighter.
In the images below, we see a 1.02-carat deep pink radiant. On the left side, the image is with a white background that shows the real color of the diamond. On the right side, a black background, which results in a much lighter diamond color. In general, a light, neutral background will show most diamond’s real colors.

The two ideal accessories to create a proper white background would be:
- Diamond color paper to place the diamond inside of (see image).
- A white diamond box to place the stone in. It is important to remove the plastic cover to receive the full luster of the stone (see image).

Lighting
The light under which the photo is taken is also an important factor. When buyers and sellers attempt to take a picture under a standard diamond lamp, moving black horizontal stripes are seen on the phone’s screen. This happens for the simple reason that the shutter speed of the phone’s camera doesn’t move as fast as the light waves of a florescent diamond lamp, especially in the video mode. So try to avoid using a diamond light when taking a picture.
Another thing to avoid is taking a picture under direct yellow halogen light. This creates excessive sparkle on the diamond, preventing a clear picture. To avoid this, stand with your back to a window and let the natural light shine on the stone. In case you are in a windowless space or it is at night, try standing in between spotlights next to a white wall to receive a scattered and even light reflecting from the large white surface.
Using the on-screen exposure features
Whether you are in video or still mode, it is very important to use the exposure sensor on the screen. Using this feature creates very accurate results and could easily compensate for poor lighting conditions.
Size and proportion
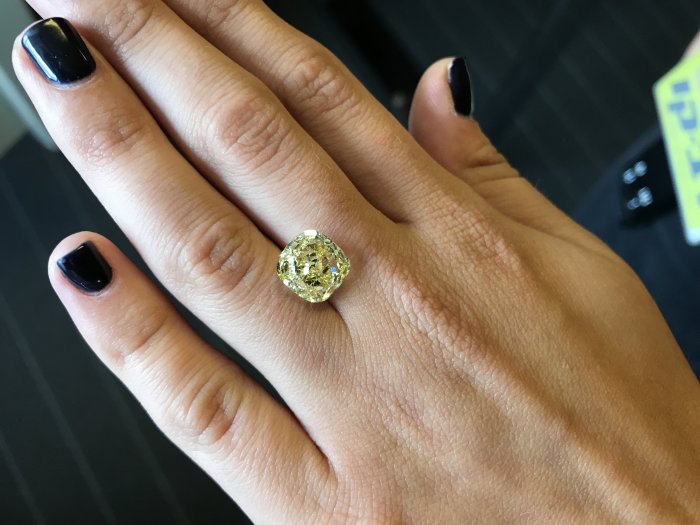
When the recipient is a nonprofessional, in most cases he or she won’t have a real sense of the diamond’s actual physical size. For that reason, it is important to send an extra picture of the stone as it lies on the back of a woman’s hand. Although a skin tone might enhance the color of the stone, it will give a true feeling of the stone’s size.
Placing on the hand for real proportion
The selfie-loupe technique
This technique produces the most authentic results if done correctly. You will need a diamond loupe and tweezers. You might need someone to hold up a white background.
- Clean the phone camera lens.
- Place the phone on a table with the screen facing up.
- Activate the selfie camera.
- Place the diamond loupe on top of the phone lens (making sure the loupe lens is clean as well).
- Hold the diamond with the tweezers above the loupe.
- Make sure the lighting fixture on the ceiling is not visible in the frame. If unavoidable, ask someone to hold up a white background 40 centimeters above the diamond.
- Fix the on-screen exposure to reach optimal look, as needed.
- Select video mode, preferably, although still images will result in an authentic image as well (the tweezers will look distorted due to the diamond loupe effect).

Conclusion
- Always select a white background, preferably.
- Use video mode for a closer view and a more realistic feel of the stone.
- Create an extra video showing the stone on the back of a hand to demonstrate actual size.
- Correct lighting with the on-screen exposure slider.
- Use the selfie-loupe technique to create best results.


